
Stop the tangle-and-slide: a $6 velvet ribbon spacer keeps chunky layers in place all day.
Use a velvet ribbon as an invisible spacer

Here is the thing nobody tells you when you start stacking statement pieces: the problem is rarely the clasp. It is the backs of the necklaces skating around on your skin, then swapping places, then knotting like they have a tiny secret mission. My fix is boring and weirdly effective: a 1/4-inch velvet ribbon, about 16 inches long, tied around my neck first, under everything. I buy a little spool of craft ribbon (the kind meant for gift wrap) at a craft store or online, and it runs about $6 for enough ribbon to last forever. Tie it snug but not tight, like you are wearing a choker you will forget about in five minutes. The velvet has grip, so it creates a little “landing strip” for the chains to sit against instead of sliding down to the same low point.
Then put on your shortest necklace and let it rest just above the ribbon, and add your next necklace so it sits just below. The ribbon is basically a speed bump. It is invisible from the front, but it stops that slow downward creep that turns a layered look into one sad clump by lunchtime. If your statement piece is heavy (think a chunky bib necklace or a big pendant on a thick chain), keep that one lowest. Lighter chains go up top, and they will behave better because they are not being dragged around by weight. The nice part is you can still use your normal lobster clasps and extenders. You are just changing the surface the jewelry is moving on.
If you wear fragrance, put it on before the ribbon so you are not misting velvet. If you are in a rush, you can leave the ribbon tied and pull it over your head later like a stretchy headband, but only if it is loose enough. Otherwise just retie it. It takes ten seconds, and it saves you from that bathroom-check moment where you realize your necklaces have merged into one indecipherable metal pretzel.
Pick one “anchor” necklace and build the rest around it
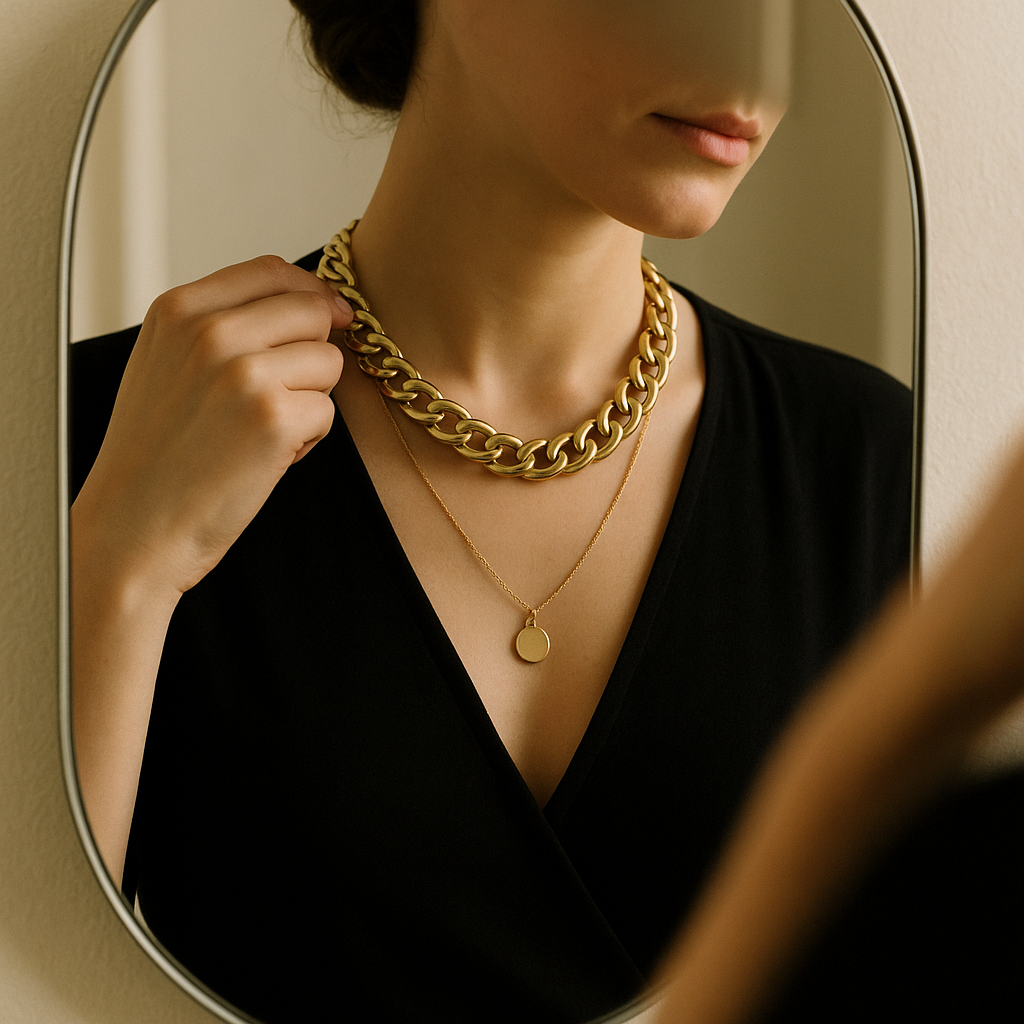
I used to start with the dainty chain because it felt “safe,” and then I would keep adding bigger pieces until the whole thing looked accidental. The trick that changed it for me was flipping the order: I choose one anchor necklace first, the one that would still make sense if I wore nothing else. That is usually a collar-style statement, a sculptural pendant, or a chunky chain that has a defined silhouette. Once that piece is decided, the rest of the stack becomes editing, not guessing.
Here is how I do it in the mirror, standing in the same spot every time so the light is consistent. I put on the anchor, then I ask two quick questions: (1) where is the visual weight, center, off to the side, spread across the collarbone? (2) what is the metal story, gold, silver, mixed? If the anchor is high and wide (a bib or collar), I add one longer, simpler line under it, usually a plain snake chain or a thin box chain with a small charm. If the anchor is a big pendant that lands mid-chest, I go the other direction: something shorter and clean up top, like a herringbone or a short paperclip chain, so the pendant does not feel like it is floating alone.
Spacing matters more than quantity. I aim for clear gaps so each piece gets its own air. An extender is your best friend here. I keep a couple of 2-inch extenders in my jewelry dish, the cheap kind from Amazon or a local bead store, because they let you nudge a chain up or down without replacing the whole necklace. If you are mixing metals, do it on purpose: match the anchor, then let one smaller piece break the rule (like a silver coin on a gold stack). When I do it randomly, it reads messy. When I do it once, it reads styled.
And if you get to necklace number three and you are fussing, stop. Two strong pieces with intentional spacing almost always look better than four that are all competing for the same inch of your collarbone.
Clasp placement: move the “lump” off-center
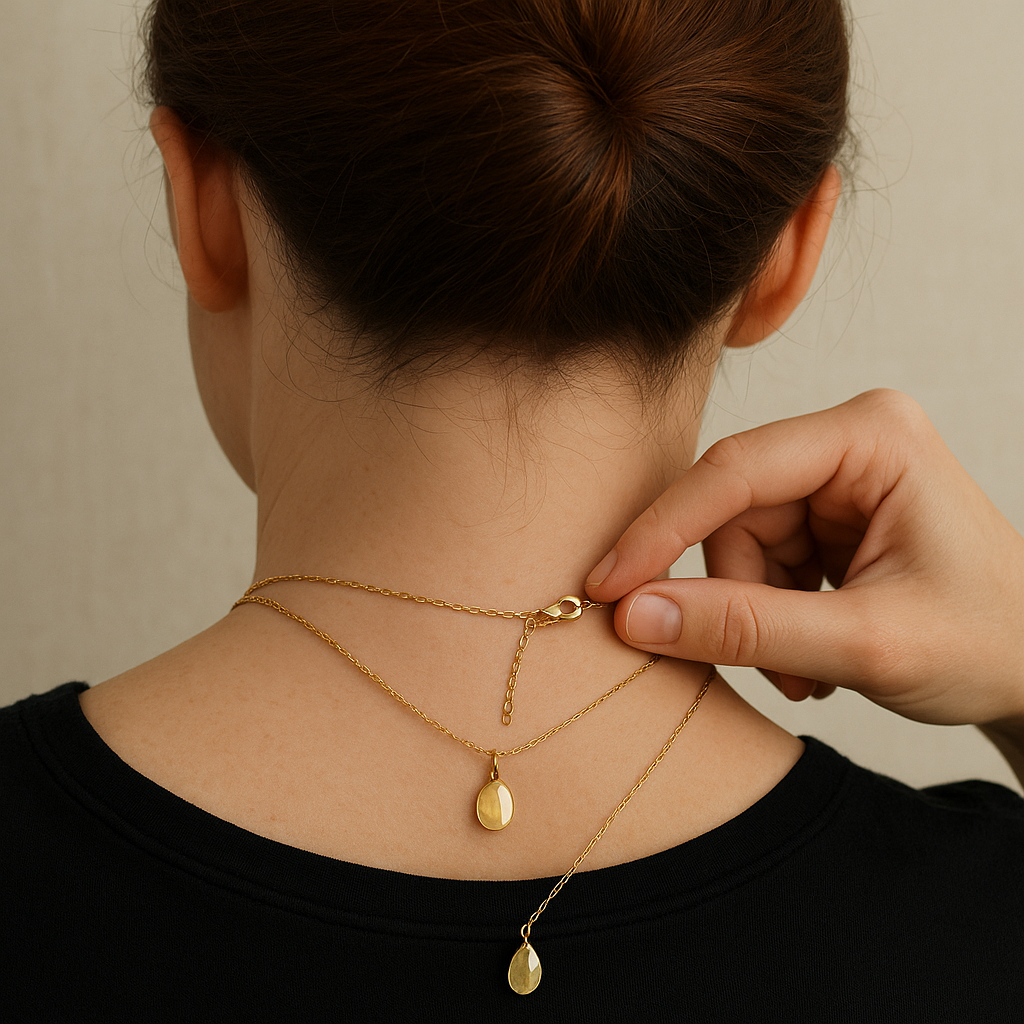
If your layered necklaces look great for five minutes and then start drifting, check the back of your neck. Most of the time it is not “slippery chains” in general. It is the hardware pileup: lobster clasp, jump rings, extender chain, and any little tag all stacked in the same spot, making a lump that catches on hair, collars, and even your skin. That lump also acts like a tiny lever, so the necklace rotates forward and your pendants migrate into each other.
The fix is simple and it feels almost too basic, but it works: after you clasp each necklace, gently rotate the clasp bundle about one inch to the left or right of center. Not all the way to your shoulder, just off the spine. When I do this, the “lump” sits in a spot that does not get pressed as hard by a chair back, and it is less likely to get snagged by the tag of my shirt. Do it for each layer, but choose different sides. I usually put the shortest necklace clasp slightly left, and the longer necklace clasp slightly right. That way the hardware is not stacked on top of itself like a Jenga tower waiting to collapse.
This is also where a low ponytail can sabotage you. If your hair is rubbing directly on the clasps, everything shifts. On days I know I will be in and out of a scarf or a blazer, I either wear my hair up or I choose one necklace with a smooth box clasp (vintage pieces are great for this) and let that be the bottom layer. If you have a magnetic clasp converter, it can make taking things on and off easier, but it also adds bulk, so I use it only on one necklace at a time.
One more tiny move: once the clasps are placed, run a finger along the front of each chain and straighten it like you are smoothing a ribbon. You can feel twists before you see them, and twisted chains are basically an invitation for tangles to form the second you start walking.